

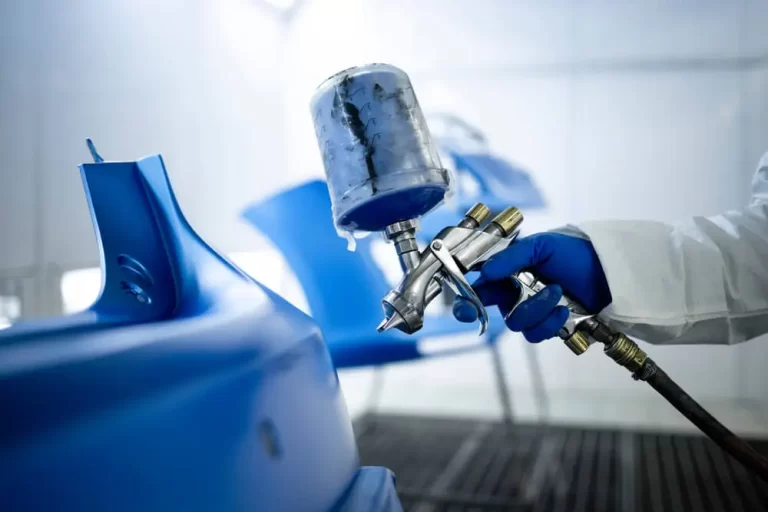
How To Clean A Paint Sprayer – 8 Easy Steps
Maintaining a paint sprayer entails more than just applying vivid coats and making your area or property into a visually pleasing beauty. Maintaining the cleanliness of your paint sprayer is an important, yet frequently forgotten, element. Cleaning properly is the backbone of excellence and long-lasting performance. I will lead you through the whole process of cleaning a paint sprayer, from gathering the necessary equipment to efficiently completing the cleaning operation, in this detailed tutorial. Following this detailed guide will help you How To Clean A Paint Sprayer in good working order, saving you time, money, and frustration in the long run. Let’s delve into the details of how to clean a paint sprayer properly.
Cleaning the sprayers with a water-based solution
Water-based paint is intended for use on a variety of surfaces. It may be used both inside and outside the home. Cleaning a spray gun after using water-based paints may appear simple, but it is not always so.
A water-based cleaning solution is one of the most effective ways to clean a paint sprayer. To clean your paint sprayer using a water-based solution, follow these steps:
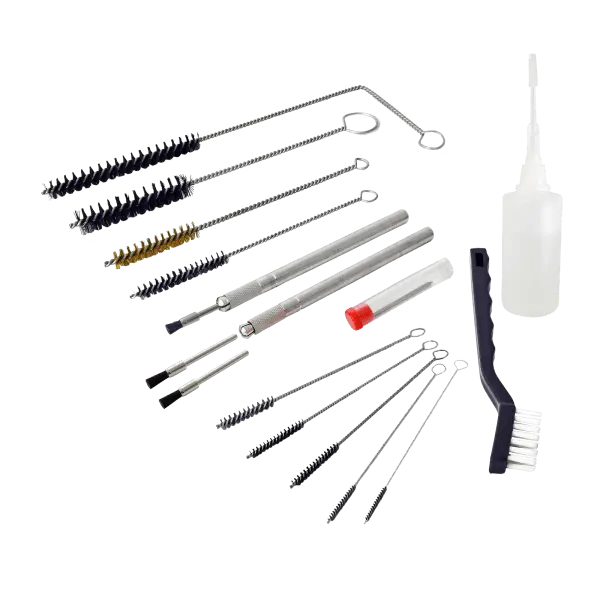
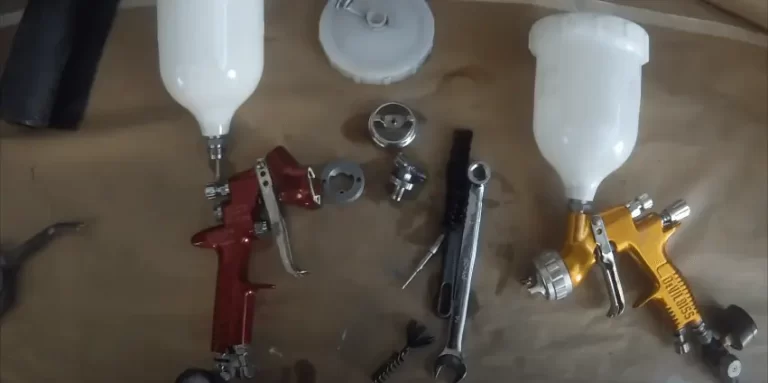
Things Required to Clean the Sprayer
Before you begin, make sure you have all of the required tools. These include:
- Sprayer: The entity that requires attention is your paint sprayer.
- Paint: You must clean the sprayer of any residual paint.
- Fluid: This can be water in the case of water-based paints, or paint thinner or white spirit in the case of oil-based paints.
- Brush: A stiff-bristled brush is good for cleaning away stubborn paint particles.
- Bucket: To hold the cleaning solution, you’ll need a bucket.
- Water: required for the preparation of your cleaning solution.
- Hose: This is useful for cleaning the paint sprayer.
- Metal and mineral: Disassembling the sprayer may necessitate the use of metal equipment, and mineral spirits may be used to remove oil-based paints.
- Wrench and Pliers: Necessary for disassembling and reassembling the sprayer.
Method to Clean the Paint Sprayer
Cleaning your paint sprayer on a regular basis will ensure its functionality and lifespan. For an efficient and complete cleaning, follow these steps:
1. Switch Off and Release Pressure
Cleaning a paint sprayer is a crucial part of its upkeep. However, before diving into the cleaning process, you must first perform a pressure relief operation to safeguard your safety and avoid any mishaps. This process aids in the release of pressure within the sprayer, lowering the danger of injury or damage during disassembly and cleaning. Always begin by turning off the sprayer and unplugging it from the power supply. To relieve any leftover pressure, Trigger the gun.
2. Prepare for Cleaning
Before you begin cleaning, make sure you have all of the appropriate safety equipment, such as gloves and goggles. Work in a well-ventilated location and shield the surrounding surfaces from overspray or paint splatters. You should also have some rags or absorbent materials on hand to wipe away leftover paint when cleaning.
3. Detach the Paint Source
The paint bucket’s intake hose should be taken off. instead, Put it in a container of clean water.
4. Flush the System
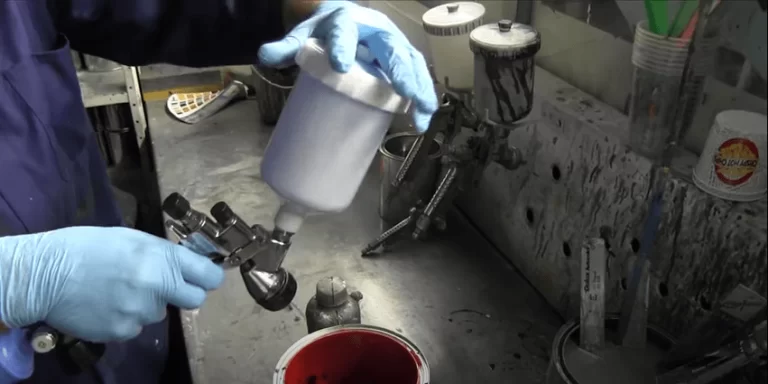
Start by removing any surplus paint from the sprayer. Remove the paint container and put any leftover paint in its original can. Then, add the proper cleaning solution to the container.
Reconnect the container to the sprayer and turn it on. In my experience, to flush the cleaning solution through the system, hold the spray gun over a trash container or bucket and press the trigger. This will get rid of any leftover paint or residue in the fluid route and nozzle.
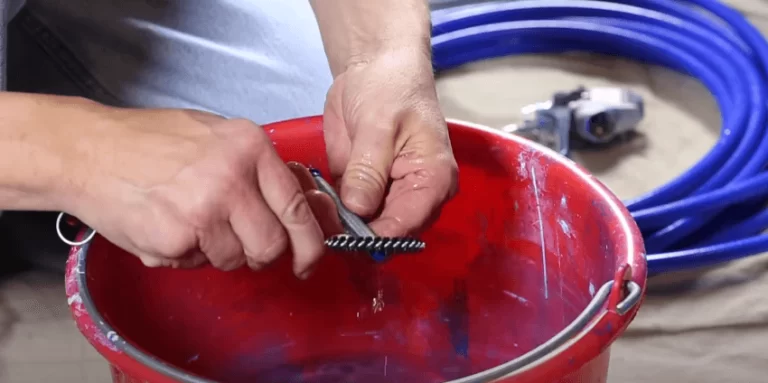
5. Disassemble and Clean the Parts
The paint bucket’s intake hose should be taken off. Disassemble the sprayer with care, following the manufacturer’s instructions. Remove the nozzle, valve, intake, pump, and any other pieces that may be removed. Place them in a jar with the cleaning solution and soak them.
After soaking, scrape away any paint or residue from the pieces using a cleaning brush or tiny bristle brush. Pay special attention to difficult-to-reach spots and crevices. To eliminate any residual cleaning solution, rinse every part with clean water.
6. Clean the Hose and Filters
The paint bucket’s intake hose should be taken off. instead, Remove the hose from the sprayer and flush it with clean water (a thorough description of how to clean spray gun nozzles, filters, and hoses is provided below). Remove any filters or screens from the hose and clean them individually. Remove any paint or dirt from the filters with a brush and water, then thoroughly rinse them.
7. Rinse and Repeat
Reassemble the sprayer components and then repeat the flushing operation to ensure that any residual paint is entirely rinsed off.
8. Dry and Reassemble the Sprayer
Before reassembling the sprayer, make sure all of the parts are thoroughly dry. Wipe away excess wetness with lint-free towels or rags. It is important to keep water and moisture out of the sprayer during reassembly since this might cause damage or corrosion.
Reassemble the sprayer according to the manufacturer’s directions once all of the components have dried. Make sure that all connections are secure and tight.
Cleaning of Oil-based Paint from the Paint Sprayer
It is crucial to clean your spray gun after using oil-based paint to ensure its performance and lifespan. Because of their thicker viscosity and prolonged drying period, oil-based paints can be particularly difficult to remove. However, with the correct procedures and tools, you can easily remove oil-based paint residues and maintain the condition of your spray gun.
1. Gather Your Cleaning Tools
Collect the necessary cleaning tools before starting. You’ll need:
- Paint thinner or mineral spirits: These solvents help break down oil-based paint.
- Clean rags or paper towels: Wipe away the paint and solvent with these.
- Small brushes or toothbrushes: These will assist you in cleaning difficult-to-reach places.
- A bucket or container: This will be used to keep the solvent in place during cleaning.
- Water and mild detergent: These will be required to rinse the spray gun after removing the paint and solvent.
2. Disassemble the Spray Gun
To correctly disassemble your spray gun, follow the manufacturer’s instructions or the user handbook. Typically, the nozzle, needle, air cap, and any other replaceable pieces must be removed.
3. Soak the Removable Parts
Fill a bucket or container with mineral spirits or paint thinner. Soak the removed pieces in the solvent for approximately 30 minutes. The solvent will then be able to loosen and dissolve the oil-based paint.
4. Scrub the Parts
After soaking, clean the paint off the parts with a little brush or toothbrush. Pay special attention to crevices and other difficult-to-reach spots where paint residue might build. Scrub the pieces until they are clean and free of paint.
5. Wipe Down the Spray Gun Body
Paint thinner or mineral spirits should be applied with a clean cloth or paper towel. Wipe clean the external surfaces of the spray gun body with a soft cloth to remove any paint residue. Make sure that all visible paint is removed.
6. Rinse and Clean
Once the detachable parts and spray gun body are clear of paint, rinse and clean them. Fill another bottle halfway with water and mild detergent. Soak the parts and spray gun body in soapy water and carefully scrub them with a clean brush or cloth. To eliminate any soap residue, carefully rinse them with clean water.
7. Dry and Reassemble
Allow the parts and spray gun body to air dry fully after washing. Before reassembling the spray gun, be sure there is no moisture left. When the spray gun is dry, carefully reassemble it in the reverse sequence of disassembly.
8. Perform a Test
Perform a test spray before using the spray gun on your next painting project to confirm everything is working properly. If required, adjust the settings and inspect for any leaks or irregularities.
The technique for cleaning an HVLP paint sprayer used with oil-based coatings is identical to that described above for cleaning equipment used with water-based paints.
The only thing that has to be altered is the water (with optional soap), which should be replaced with acetone, mineral spirits, or thinner.
Method to Clean Dried Paint from Paint Sprayer
Oh, the pleasures of painting! When i tackle a project with our trusty paint sprayer, i all get a sense of achievement. But don’t forget about the essential step that comes afterward: cleaning. Yes, it may appear appealing to put off cleaning until another day, assuming that you’ll get to it eventually.
However, it is a decision you will come to regret. You see, if you let the paint dry in your sprayer, you’re inviting a cleaning disaster. So, here’s a piece of helpful advice: don’t leave dried paint in your sprayer. In my experience, spend a few additional minutes cleaning up after each painting session. Not only will you save future difficulties, but you’ll additionally be sure that your sprayer is in good working order and ready to tackle your next masterpiece.
Process of Cleaning the Nozzle of a Paint Sprayer
Depending on the type of paint sprayer, the nozzle can be detached or have a locking mechanism. To remove the nozzle without causing harm, carefully follow the manufacturer’s instructions. To avoid loss or contamination, place the removed elements on a clean cloth or towel.
Fill a container or a sink with clean water or the suggested cleaning solution. Make sure the nozzle is completely immersed in the solution. Allow it to soak for the appropriate time, which is usually specified in the user manual.
After soaking, carefully clean away any loosened paint remnants on the nozzle with a gentle brush or toothbrush. Avoid using excessive force or abrasive materials that might harm the nozzle’s surface. For more difficult blockages, a needle or an unclogging tool may be required. Insert the needle gently into the nozzle apertures to remove any dried paint or dirt.

Rinse the nozzle thoroughly with clean water to remove any residual cleaning solution or loose paint. Reattach the nozzle to the paint sprayer once it has been cleaned.
Cleaning of Filters
Depending on the model, the filters may be positioned near the paint container or in the handle assembly. To reach the filters, carefully remove any covers or casings. Once the filters have been accessed, gently remove them from the sprayer. Some filters are screwed or snapped into place, while others must be released by twisting or sliding.
Gently agitate the filters while holding them under a stream of clean water to release any trapped particles. Scrub away tenacious debris with a soft brush or toothbrush, making sure that all regions of the filters are properly cleaned.
Proper filter cleaning is essential for obtaining continuous paint flow and eliminating blockages caused by debris or pollutants in your paint sprayer.
Priming Sprayer with Water
Water priming a paint sprayer is an important step in ensuring smooth paint flow, preventing clogging, and achieving peak performance. Water priming is very beneficial when changing between paint colors or after a period of inactivity.
You may remove any residual paint particles by running water through the pump system, preventing them from blocking the spray nozzle or harming the quality of your new paint application.
Flushing the pump with water on a regular basis aids in the removal of paint residue and prevents it from drying and accumulating inside the system. This maintenance procedure extends the life of your paint sprayer.
Cleaning of Paint Sprayer Hose
The paint sprayer hose is an essential component that transports paint from the sprayer to the nozzle. Paint residue, debris, and blockages may gather inside the hose over time, limiting paint flow and spray quality.
Dip the paint sprayer hose into a container of hot water. Assemble the hose so that it completely immerses itself, allowing the cleaning solution to enter and break down any tenacious paint or dirt. After soaking, carefully clean the exterior of the hose with a gentle brush or toothbrush.
After you’ve finished scrubbing, properly rinse the hose with clean water. Remove any leftover cleaning solution or paint remains. You can rinse the hose with water or in a separate container. To extend the life of your paint sprayer hose, you should clean it at least once a month.
Finalizing everything
Before reassembling the sprayer, make sure all of the parts are thoroughly dry. Wipe away excess wetness with lint-free towels or rags. It is extremely important to keep water and moisture out of the sprayer during reassembly since this might cause damage or corrosion.
Reassemble the sprayer pieces once they have all dried. Take your time cleaning thoroughly to guarantee excellent paint flow in the future. Before utilizing the sprayer on your next job, conduct a test run with water or the appropriate solvent to confirm that the hose is clean and functional.
FAQs
Conclusion
Cleaning a paint sprayer may appear difficult, but it is not. With practice, the process gets more comfortable, and good maintenance will guarantee that your sprayer stays a reliable tool for your home repair and building needs. Remember that the quality of work your paint sprayer can create is directly linked to its cleanliness and functioning. So, put in some effort to maintain your equipment, and it will undoubtedly pay you in the long term.