

Can You Bake Acrylic Paint On Ceramic Mugs and Plates
Customizing products is a common hobby nowadays. People paint custom designs on their plates and mugs. If you want to know “Can you bake acrylic paint on ceramic mugs and plates?” Read this article to learn more about it.
Acrylic paint sticks to any porous and absorbent surface. Acrylic adheres to ceramics but will flake off if left to dry. To ensure that the acrylic stays on your ceramics, you must seal it and bake it. This is a fantastic way to pack and preserve painted objects.
Baking gives ceramics a matte texture, making them more attractive and allowing you to design your DIY present. While most acrylics can be used as bake paints and may be used to bake ceramics in your oven, there are a few things to remember while painting on plates and mugs.
Can You Bake Acrylic Paint On Ceramic Mugs? Explanation
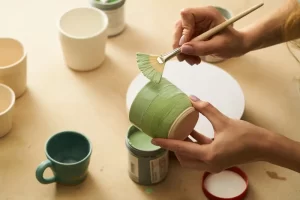
If you want to use acrylic paint to decorate your mug kit, you should go for one that hasn’t been glazed. The first step in painting a mug with acrylic paint is to locate the ideal workplace. Although acrylic paint is non-toxic and odorless, it still needs to work in a well-ventilated space.
Pouring your pigments onto a palette allows you to blend colors more quickly if you wish. After that, you’ll need to prepare your paints. Cover your desk with many layers of newspaper to keep stains at bay. Pouring the color, you wish to use onto a palette is highly recommended.
This will lessen the chances of paint leaking and leaving a stain. To get the most acceptable results, start by drawing your design in pencil on the cup. This will make it simpler for the paint to adhere to the mug’s surface, resulting in a much more excellent finished product.
When painting, work in thin layers. The thin layers will give you better control over your pattern while preventing cracks and chipping. Allow the mug to set for a minimum of 12 hours after you’ve finished painting it before sealing it. You may add more layers if required, but you can’t remove them.
Is Acrylic Paint Compatible With Ceramic Plates?
You may use acrylic paints to paint ceramic plates. Before you begin painting leaves with acrylic paint, you must first erase any stickers that may be there. To avoid ruining your design, let the plates set for at least 2 hours before beginning to paint.
Dust the plate to remove any dirt or particles that may have developed when it was placed on the shelf after removing the stickers. The white ovenproof plates make a perfect blank slate for any design you have in mind.
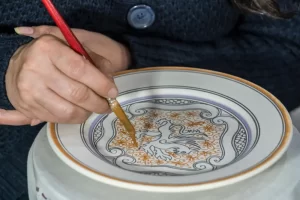
After that, you’ll want to wipe the plates off with rubbing alcohol. To do so, rapidly dip a clean towel or carpet fiber cloth into the denatured alcohol. Wipe the alcohol off the dishes with a paper towel. To avoid ruining your design, let the plates set for at least 2 hours before beginning to paint.
Unfinished ceramics, ranging from plates to cups to home décor, are available at New Hampshire Craftworks. There are oven-safe ceramic plates available that are ideal for this project. You can find these plates locally at any ceramic shop.
You should rehearse your design on paper before you start painting. Allow 12 hours for the paint to dry once you’ve done painting before sealing it. Allowing the paint to dry before sealing can keep your design from being destroyed.
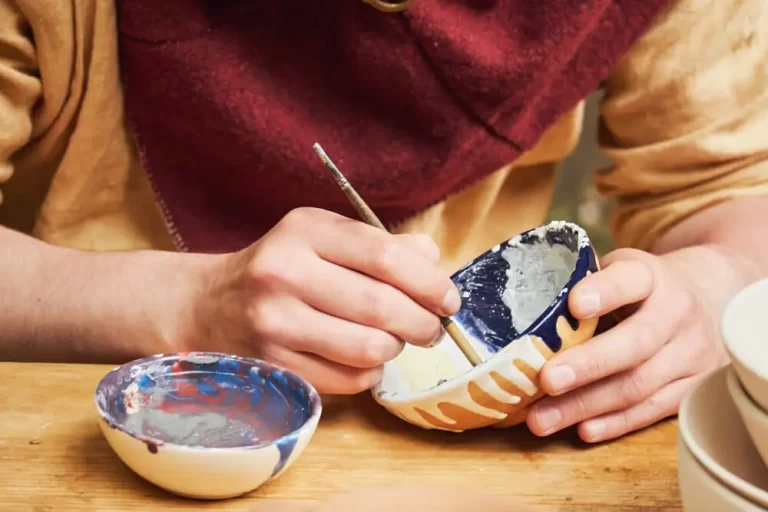
Procedure to Seal Acrylic Paint on Ceramic
Now, how to seal acrylic paint on ceramic mugs? Ceramic mugs and plates are sturdy, but they cannot be referred indestructible. If acrylic paint is not sealed correctly, it can easily flake or scrape off the surface.
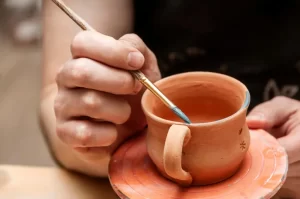
In my experience, If you want to use acrylic paint to adorn a ceramic mug or plate, you should know how to seal painted ceramic vessels. You can follow a few basic procedures to ensure that your pattern will stay.
Step 1: Clean the Mug
You should use soap and water to clean the mug or plate’s surface. This will eliminate debris or residue that may cause hindrance in the paint sticking to the surface.
Step 2: Apply Primer
Prime the surface with a coat of primer. This will provide the paint with a smooth surface to cling on. After the primer has dried, you may start painting your pattern with acrylics. Use acrylic paint that is made exclusively for ceramics.
Step 3: Apply Non-Toxic sealant spray
Let the color completely dry once you’ve finished your design. Apply a coat of clear non-toxic sealant spray to the surface after that. This will assist in preserving the paint by preventing chipping and scratching. Allow for thorough drying of the sealer before using the mug or plate.
Why Is Sealing Paint Necessary?
Water-based sealers are usually easier to apply, although they aren’t as long-lasting as oil-based sealers. Acrylic paint is based on water paint that You may use to paint on ceramics. Follow the directions closely and let the paint completely dry before using the ceramic item, whichever type of sealant you pick.

You may use acrylic paint on mugs to produce a stunning and unique work of art with little effort. Water-based and oil-based sealers are the two most commonly used types of sealers. Although oil-based sealers are harder to apply, they are more durable and produce a more excellent finish.
Baking Acrylic Paint on Ceramics
Roasting acrylic paint on ceramic mugs in the oven results in a thick, chip-resistant layer. Learning how to bake the porcelain piece can help you prevent common baking mistakes.
So, to assist you, I’ve written a step-by-step guide on how to bake ceramic paint on a decorated ceramic item in the oven. Follow the procedure carefully to paint mugs at home.
Step 1: Dry Your Ceramic Piece:
Paint your ceramic object using toxic-free acrylic paint before baking it in the oven. Spray paint or a synthetic brush are the two options for applying paint to your ceramic sculpture.
Regardless of your method, ensure all paint layers are dehydrated before baking the ceramic item. You may check if the paint is dry by touching it. You can move on to step two if it doesn’t come off.
Step 2: Heat Your Oven Before Baking
Placing a ceramic item in a hot oven is a disaster. To avoid breakage or fracturing, ceramic artifacts must be heated gradually. Bake your ceramic item on a baking tray and place it in a cold oven to avoid this. Make sure the oven does not reach 350 ° degrees Fahrenheit (F) and move to step 3.
Step 3: Put Your Ceramic Piece In The Oven For Baking
Set the timer for 30 or 35 minutes as the oven temperature rises to 350 degrees Fahrenheit, depending on the size of the ceramic object. Baking smaller items, like cups, takes less time.
Step 4: Let The Piece Cool Down
The timer should sound after thirty minutes, signaling it’s time to switch off the oven. To minimize breaking, don’t extract the ceramic piece immediately; let it rest for a few hours.
Your painted ceramic item will be safe to use after that, and you may wash it without concern of the paint flaking off. Use abrasive agents sparingly on your colored ceramic item, and wait 72 hours before utilizing the baked parts.
Is Heating Acrylic Paint Safe?
A typical way of putting acrylic paint into a completed piece is to use a heat set. When the paint dries too quickly, chemicals may be discharged more quickly. You can use a blow dryer that gives out less heat to prevent the color from overheating. When a job is finished, blow blowers and thermal guns are routinely used to accelerate the drying process, but this will only be done in airy environments.
If the paint has hardened to a solid form, it can be heated to a higher temperature, but not over 900 Fahrenheit if it is still moist.
Is Acrylic Paint Safe To Put In The Oven?
Can you bake acrylic paint? Baking acrylic paint inside the oven is safe, but ensure that the color you choose is non-toxic. I mention this because when acrylic paint is heated, it releases a chemical that is harmful to one’s health if breathed in significant quantities.
Allowing acrylic paint to rest for one day before baking will prevent it from emitting those hazardous fumes. This allows the harmful fumes from your acrylic paint to dissipate. Working in an airy area also prevents you from inhaling dangerous fumes once you’ve finished baking.
Is The Use Of Microwave For Baking Ceramic Safe?
If you want your glazed ceramic plate to dry quickly, there are several alternatives to using the microwave. Most paints can be reheated in the microwave for a few seconds, but I don’t suggest it.
So, if you want to speed up the drying period of your glazed ceramic plates, try using a hair dryer. When using a microwave, avoid overcooking the painted ceramic, as this might cause cracks.
Also, use the lowest setting on the hairdryer and prevent blowing air too near the plate. Otherwise, excessive heat will cause bubbles, cracks, and a change in the color and quality of the paint.
Is Acrylic Paint Safe To Put In The Dishwasher?
Acrylic paint provides a robust covering that resists the weather, so objects painted with it can survive for a long time. However, you cannot say that acrylic paint cannot peel off. If not correctly cared for, it will deteriorate over time.
You may wash acrylic paint in the dishwasher, but only if the painted item is baked and sealed to prevent flaking when soaked in water. If you want to clean your baked acrylic paint piece, do so sparingly and with soft materials to avoid removing the paint.
How Do Make Paint-Coated Pottery Safe For Food?
You must bake acrylic paint on ceramic plate in the oven or use a food-safe sealer to make it food-safe. Set the timer for 35 minutes if you’re going to bake your decorated plate to prevent overheating it.
Grab the brush and start coating your colored plate until it is completely covered. If the dish is not marked as oven-safe, quick heating will cause stress, resulting in fractures, breaking, or explosions. Many food-safe sealers are available at local stores; a few are sprayable, but I prefer using a brush-on sealer.
This prevents bubbles from developing in the sealer after applying them to your painted plate. If you use a spray-on sealer, carefully spray the colored dish from a safe distance.
But first, double-check that your dish is oven-safe. You can put off eating off your decorated plate for 2 to 3 days. Dip your synthetic brush into the sealer and use it to apply the sealer. Stir the sealer with the brush until all bubbles have vanished.
This ensures that there are no visible brush marks and that the covering is consistent. Allow it 45 minutes for the sealer to bond and air dry before touching it. It’s also a good idea to wait two days before using the oven to let the paint fumes escape.
As previously indicated, do not use non-oven compatible plates in the oven. If you do not intend to bake your decorated dish, make sure it’s scorched by placing it on a drop cloth. However, it would help if you took advantage of efficient methods while painting your ceramics.
Is Heated Paint Hazardous?
Acrylic paints are typically safe since they are water-based; however, not all of them are water-based, and you shall be informed of this.
However, if you get enough ventilation sooner rather than later, you won’t put your health in danger. You can use a water-based drying approach instead of a chemical-based drying method.
So, as a result, the number of chemicals emitted will be reduced. When it dries, the chemical vapors are gone, and they may be cooked safely. The truth is that if the paint is dried, heating it will not affect it.
Best Paint Compatible with Ceramics
If you wonder “What paint to use on ceramics?” or “Can you use acrylic paint on ceramic?” here I have discussed it in detail. The majority of acrylic paints are appropriate for use in ceramics. You can also use spray paint. Oil, epoxy, and water-based paints are some of the best colors for ceramic mugs.
However, for safety reasons, oil-based paints should not be heated inside the oven.
Before you buy, though, make sure to read the paint label. Unglazed ceramics work well with some acrylics. Painting on glazed ceramics using acrylic paint is not a good idea. Look for colors for ceramic plates that can be washed in the dishwasher. Glitter paints are also not suitable for oven drying.
Frequently Asked Questions- Baking Acrylic Paint on Ceramic Mugs and Plates
Conclusion- Can You Bake Acrylic Paint on Ceramic Mugs and Plates
Acrylic paint may be baked on ceramic dishes and mugs. Make sure, however, that your materials are non-toxic and food-safe. After that, you do not need the oven to cook food. After baking, seal the paint to the surface for safety reasons. You can use a water-based lacquer, moth sealer, or transparent acrylic paint. I hope that your queries regarding “Can you bake acrylic paint on ceramic mugs and plates?” are answered.