

How to Fix Spray Paint Mistakes – Detailed Guide 2024
Several DIYers find painting to be an intriguing task, while some folks are just scared of the results. There are explanations for this fear. This is very significant because painting affects the product’s longevity and look. They frequently avoid painting their own homes out of concern that they may make a mistake.
Spray paint still causes uncertainty for some individuals even when they learn to use paint. In this guide, you will discover some common spray paint mistakes how to fix the uneven spray paint, and other information you need to fix the mistakes.
How to Fix Spray Paint Mistakes? Explanation
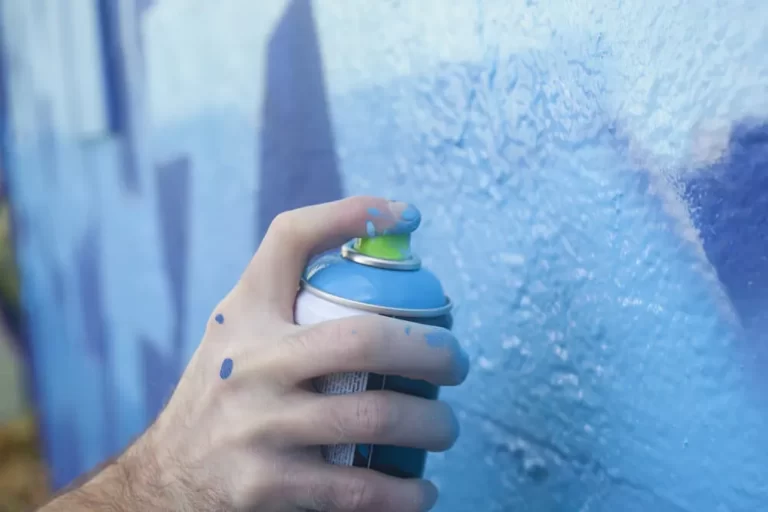
The spray painting method is one of the quickest and simplest ways to paint over any surface or object, even if you’re using an aerosol can or a sprayer. Spray painting offers a very clean consistency without brush strokes, and the paint rapidly penetrates even the smallest crevices on the surface. You will, however, occasionally encounter a few issues.

You may maximize the effectiveness of your spray painting endeavor with the help of these methods and recommendations.
Common Spray Print Mistakes
1. Fisheyes
This is not a discussion about camera lenses. The tiny round specks that occasionally emerge in your paintwork as it dries are called fisheyes. They are brought on by surface flaws or impurities like oil and grime. Ensure your texture is sufficiently prepared before painting to prohibit fisheyes in the future. You must give it a thorough cleaning and try your best to sand away any surface flaws.
2. Orange Peel
Orange peel got its name because, after the paint dries, it develops a tonne of tiny pockmarks that make the paint’s surface like the peel of an orange.
Stop doing this because it is not a good appearance. Over-spraying, or putting excess paint in a single coat, is the root of the problem.
So, How to prevent orange peel in a clear coat? Applying thinner coats will prevent you from getting an orange peel. Apply additional thin coats as necessary to achieve a strong, uniform finish. To prevent creating new issues, ensure every coat gets more time to dry.
3. Cracking
One of the really frequent blunders is spray paint cracking. Poor surface preparation is typically to blame, which results in weak, inefficient adhesion. Being more thorough with your preparation is the greatest method to prevent cracking. Before painting, ensure the body is entirely neat.

The paint may not adhere as it should if there are any oils, stains, or other impurities. This will cause cracking, so be extremely thorough and take your time with the preparation.
4. Blotchiness
You may end up with a patchy finish if you use spray paint to cover a huge area. Spray paint frequently appears blotchy because it may be very challenging to apply it evenly, particularly on large surfaces.
How to fix blotchy spray paints? The best solution for this is to evenly sand the completed coat using fine-grit sandpaper. After that, add a layer of clear coat to complete it.
5. Overspray
This blunder relates more to the area around your paint location than it does to your job. Overspray occurs when paint spills over and lands on neighboring objects, giving all in the area a scattered appearance.
You must thoroughly prepare the area to be painted before using spray paint. Your best buddies are cardboard, plastic, newspaper, and sticky tape. You should wear them over anything you don’t want to be covered. Don’t think that you can just target the can and steer clear of overspray. Spray paint is quite messy! Covering whatever you don’t want to be painted is the only method to prevent overspray.
You have limited selections if there is any overspray on specific goods. If it’s still moist, you might try wiping it away with water. Try adding turpentine or paint thinner if it’s dry. You could also just use a rough sponge or the tip of your nail to scrape it off.
6. Peeling and Flaking
Cracking, flaking, and peeling are typically the results of subpar preparation, which stops the paint from fully sticking. Typically, this is caused by impurities on the surface, such as dust, grime, or oils from your fingertips. The easiest approach to avoid this problem is with careful prep work.
In my experience, Any contaminants on the body might result in the paint flaking and peeling as it cures. If you want proper adherence, ensure your area is fully clean and free of any impurities before spraying.
7. Torun and Drips
Even while all of these errors are frequent, torches and drips are most likely the frequent paint problem of them. Toruns or drips can result from a variety of technical errors, but they are all ultimately caused by applying excess paint to one spot. This could be the result of working too slowly, spraying too closely, or just attempting to apply a coat that is too thick.
It takes patience to avoid drips and toruns. Applying thin layers is required, and you have to wait until they are fully dry before applying another coat. You’ll always have runs or drips when you’re in a hurry and try applying too much paint at once. Similar issues with runs and drips will persist if your spraying technique is poor and you are spraying an uneven coat while going at erratic speeds.
To lessen or get rid of all the toruns and drips you’re now having, don’t apply too many paints at once and master effective spraying skills.
8. Spray Paint Lines
You are not alone if you have ever had spray paint lines that you couldn’t remove. These can be annoying and mar an otherwise fantastic paint job. They frequently result from filthy or clogged tips. How to get rid of spray paint lines?
While applying a spray, wipe out the tip and let it sit in a cup of lighter fluid for a few moments to remove any obstructions to stop the spray paint lines. If that doesn’t remove any hard-dried paint, you might have to let it sit overnight.

By always wiping your tip after painting, you can prevent spray paint streaks in the future. To dissolve and erase any paint, soak it in paint thinner. You’ll probably encounter these bothersome paint lines once more if it dries in the tip.
You must adhere to the same fundamental procedure while utilizing a sprayer. Remove the spray handle’s tip and submerge it in a glass of paint thinner. The opening can then be made clear by using a little pick. Spray lines and a blocked spray nozzle will emerge from any dried paint.
9. Smudged Paint
It’s simple to become overeager and want to apply the next coat right immediately when painting a job. However, if you attempt to add further coats of paint before the initial coat has dried, you will end up with smudged paint, which will destroy your project and force you to start over from scratch.
Fortunately, it’s a rather simple error to avoid. Simply exercise patience! Find out how long it requires for the paint to dry between applications by reading the instructions on your spray paint can. After that, wait that long before repainting! When you want to repaint, you can use your finger to check to ensure the paint is not crusty. Before you add any further paint, it must be entirely dry to the touch.
10. Shrinking
This is an intriguing error, and if it occurred to you, you likely wouldn’t understand what went wrong. When painting in exceptionally harsh or damp conditions, shrinking frequently occurs. The paint will begin to dry out and shrink as the temperature goes up or the humidity levels fall. Only when there is a significant change in humidity from wet to dry or in temperature from cold to hot does this occur; it doesn’t occur under normal conditions.
It’s not too tough to avert this error. Just be cautious to paint only when the weather permits. Pick a day with average temperatures and no chance of rain. As an alternative, you may paint in a climate-controlled environment inside. Use only paints that are safe for indoor use.
11. Paint Blobs
Paint blobs are prone to appear if you paint while carrying the can or sprayer too closely, working slowly, or using excessive amounts of paint in any one location. These paint globs, which can resemble wax melting, will utterly damage the quality of any paintwork. The easiest way to prevent paint blobs is to employ proper techniques when applying spray paint, as they are primarily produced by ineffective techniques.
Always keep the paint can at least 10 to 12 inches away from the body you’re dealing with. Before spraying, shake the can thoroughly, and keep shaking it every few strokes. Use even strokes while painting and move along at a modest pace. Stop going too slowly because this can lead to the paint blobs you’re wanting to avoid when the paint builds up.
How to Fix Spray Paint Mistakes?
You have a few options if there is any overspray on specific goods. If it’s still moist, you might try wiping it away with water. Try adding turpentine or paint thinner if it’s dry. You could also just use a rough sponge or the tip of your nail to wipe it off.
Step 1: Allow Enough Time For Curing
It’s difficult to avoid correcting a problem as soon as you notice it. Being impatient will only make things worse. Before you can start correcting your mistakes, they must have fully dried. After giving sufficient time to paint to cure, go to step two.
Step 2: Proper Wet Sanding is Necessary
After the paint has fully cured, the following step is wet sanding. To start a new paint scheme, I need to restore the paint to its original condition. For wet or dry sanding tasks, a thousand or more grit number is advised.
Sand can be moist in two different manners. Before sanding, you can either dampen your sandpaper or spritz the area with water from a spray bottle. long as you don’t use too much water, you can still use it. The sandpaper doesn’t have to be submerged in water.
You should sand away every imperfection to get a flawlessly smooth surface. Back to a bare surface can be necessary as a result. In contrast, it might merely require sanding off the top layer of paint. You should decide what you think about it. Try sanding it to make it as smooth to the touch as feasible.
Step 3: Clean the Surface
After wet sanding, you must make sure the surface is totally dry. The following round’s preparations get underway. It’s crucial to properly prime our surfaces before spraying the paint to prevent spray paint disasters.
The surface must be flawless and free of defects. If any contaminants on the surface could prevent the paint from adhering, the overall process will need to be repeated.
To make sure the surface is pristine, apply turpentine or rubbing alcohol. Use a rag that does not spread to replace paper towels, which end up leaving too many fibers behind.
After washing and priming the surface, let it dry fully before proceeding to step four.
Step 4: Apply Primer at the Right Time
For the paint to stick and coat evenly, you’ll need to prime any areas where you completely remove the paint and were left with a bare surface. If you’ve already finished painting, you can ignore this important step and proceed to the next one. Before using the primer, make sure to carefully follow the instructions on the can.
Just like with spray paint, you may apply it by holding the can about 12 inches from the object you’re painting. Apply paint with uniform strokes while advancing gradually from the start to the end. Make sure the primer has dried fully before painting.
If you’re using a sprayer, your primer needs to be the right texture. Apply it next in broad, even lines that partially overlap.
Step 5: Apply the Paint
Make the effort to clean and prime your wall after removing the previous paint. It’s time to apply your paint again after you’re finished with that. Ensure the body is totally dry before you start painting.
Initiate by examining the guidelines on the paint cans. Ensure you follow them precisely. The viscosity of the paint should be appropriate for your sprayer.
Use a paintbrush to apply long, uniform strokes. Between you and your work area, leave about 10 to 12 ” of paint space. Be cautious not to use too much paint. To achieve the most even coverage, apply a very light application instead.
Step 6: Provide the Drying Time
After painting, it can be tempting to move quickly before the paint has fully dried. Before adding further coats, you must allow the paint to fully cure.
Make sure you adhere to the paint can’s instructions. Ensure they inform you of the time required for the paint to dry in between coats. Wait at least that long and then check to see if the paint is dry before applying additional.
Step 7: Apply More Coats
Applying additional coats while using the right technique can be necessary to finish the job. You’re done once you’ve painted the entire area with a couple of thin, even layers of paint. You risk having smeared paint if you don’t wait long enough between applications.
Final Words
I hope that you understand enough about how to fix spray paint mistakes. Spray painting may appear quick and simple, but the easiest part is messing it up! Spray paint can readily result in undesirable results, such as orange peel or paint drips.
However, if you take the proper precautions and sand down your errors, you may repaint over them and still achieve the lovely finish you were looking for.